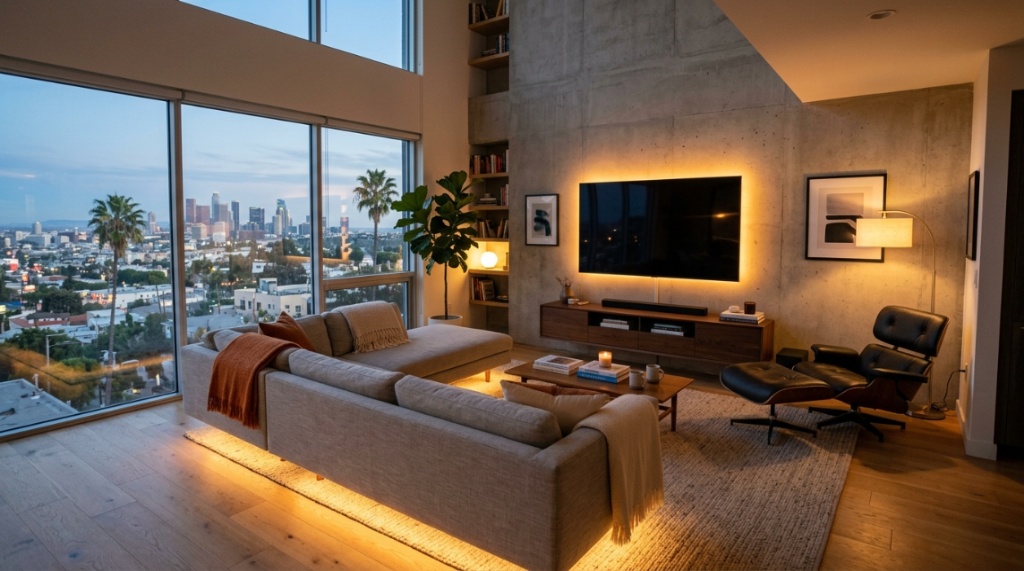
You just moved into a new apartment in Los Angeles, or you are finally tackling that kitchen remodel in San Francisco. The cabinets look great, but the shadows are killing the vibe. You want under-cabinet lighting that looks high-end, not something that screams bargain bin. The problem is, every time you search for strip lights, you get either overpriced designer brands or cheap junk that flickers out in three months. In California, with energy costs and specific building codes, the stakes are even higher. You do not need to break the bank or sacrifice quality. This guide will walk you through exactly how to find affordable LED strip lights California homeowners actually trust, without getting burned by low-quality imports.
What Makes LED Strip Lights “Affordable” in California?
Affordable does not mean cheap. In the California market, affordable LED strip lights balance a low upfront cost with long-term energy savings, durability, and compliance with Title 24 energy standards.
The Real Cost of Cheap Strip Lights
If you buy a $5 roll of LED lights from a random online seller, you will likely replace them within six months. Cheap strips often use low-grade chips, inadequate adhesives, and no heat sinking. When they fail, you have to tear down the installation, which costs time and frustration. A truly affordable product costs slightly more upfront but lasts years without fading or flickering.
Why California Has Unique Requirements
California enforces strict energy efficiency standards (Title 24) for lighting. While strip lights are often exempt for decorative use, any hardwired installation must meet specific efficacy ratings. Affordable options in CA must be either low-voltage plug-in units or compliant hardwired fixtures. You also have to consider the climate: heat and humidity near stoves or sinks demand better insulation than standard strips provide.
Key Features of a Cost-Effective Strip
Look for a high Color Rendering Index (CRI 90+) for true color, a consistent color temperature (2700K to 3000K for warm white), and a strong 3M adhesive backing. A good affordable strip will also include a dimmable driver, giving you flexibility without upgrading later.
How to Identify Quality Without Paying a Premium
You can spot a quality strip light by checking three technical details: the chip density, the copper trace width, and the IP rating.
Chip Density Matters More Than Brand Names
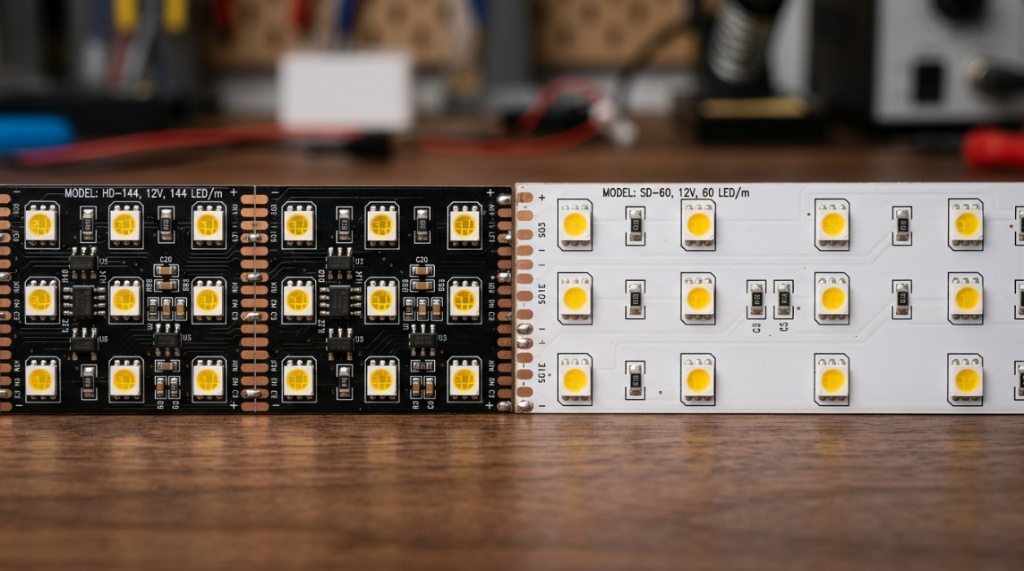
A strip with 60 LEDs per meter (SMD 2835) is the sweet spot for under-cabinet lighting. It produces smooth light without hotspots. Higher density (120 LEDs per meter) looks great but costs more and generates more heat. For general accent lighting, 60 LEDs per meter is the most affordable LED strip lights California residents rely on for a clean, professional look.
Copper Trace Width and Voltage Drop
Wider copper traces allow the strip to carry current further without dimming at the end. Cheap strips use thin copper, causing the last few feet of the strip to look yellow or dim. A quality affordable strip uses 2 oz or 3 oz copper. If you are running strips longer than 16 feet, invest in a strip with a higher copper weight or run parallel wiring.
IP Rating: Waterproof vs. Dry Location
For kitchen cabinets, you want IP20 (non-waterproof) or IP44 if you are near a sink. IP65 or IP67 strips are fully encased in silicone, which traps heat and actually shortens LED lifespan in dry applications. Do not overpay for waterproofing you do not need. Save that money for a better driver or remote dimmer.
Which Type of LED Strip Should You Buy for Cabinets?
For cabinets, you have three main choices: hardwired systems, plug-in adapters, and puck light alternatives. Each has a different cost profile and installation difficulty.
Hardwired Strip Lights
Hardwired strips connect directly to your home’s electrical system. They look the cleanest (no visible wires) and are required for new construction or major remodels in CA. They cost more upfront due to the driver and labor, but they last longer and add home value.
Plug-in LED Strip Kits
These are the most affordable option for renters or DIYers. You simply plug the strip into a wall outlet and use adhesive to mount it under the cabinet. Look for kits that include a remote control and a dimming function. The downside is the visible plug or wire, but many kits now include a right-angle connector to hide the cord behind the cabinet face.
Comparison: Strip Lights vs. Puck Lights
| Feature | LED Strip Lights | LED Puck Lights |
|---|---|---|
| Light Coverage | Even, continuous beam | Spotty, individual circles |
| Installation Difficulty | Moderate (cutting required) | Easy (stick on) |
| Cost per Linear Foot | Lower for long runs | Higher for long runs |
| Best For | Under-counter, coves, shelves | Inside cabinets, display cases |
For task lighting over a countertop, strip lights win every time due to the even coverage. Puck lights are better for accent lighting inside glass cabinets where you want discrete points of light.
How to Measure and Install Affordable LED Strip Lights
Measuring accurately saves you money and prevents waste. You do not want to buy an extra four feet of strip that you cannot use.
Step-by-Step Measuring Guide
- Measure the exact length of the underside of your cabinet in inches.
- Divide by 12 to get feet. Add 10% for margin of error.
- Check if the strip can be cut at specific intervals (usually every 1 or 2 inches). Make sure your measurement aligns with a cut line.
- Measure the distance to the nearest power outlet. Add this length to your total.
Installation Tips for a Clean Look
Clean the mounting surface with isopropyl alcohol before sticking the strip. Buy aluminum channels (U-channels) to house the strip. Channels dissipate heat, protect the adhesive, and diffuse the light for a soft glow. A basic channel costs $10 for an 8-foot length and makes a $20 strip look like a $100 professional installation.
Common Installation Mistakes
- Not using a connector when turning corners. Bending the strip around a 90-degree corner breaks the copper traces.
- Plugging too many strips into one low-power adapter. Overloading causes flickering. Check the wattage rating of your power supply before connecting.
- Forgetting to account for the dimmer. Many affordable strips are dimmable but require a specific dimmer switch. Confirm compatibility before buying.
Can You Use Smart Controls on Affordable Strips?
Yes, but you need to choose the right driver. Smart control capabilities do not automatically mean a high price tag.
Wi-Fi vs. RF Remotes
RF (radio frequency) remotes are the most affordable and work through cabinets and walls without a direct line of sight. They cost $10 to $20. Wi-Fi enabled strips cost more (around $30 to $60) and allow voice control via Alexa or Google Assistant. If you just want on/off and dimming, save money with an RF remote.
Zigbee and Z-Wave Options
These are for advanced home automation systems. They are generally not necessary for a simple under-cabinet setup. Skip them if your goal is affordability. Stick with basic smart plugs and RF dimmers for the best value.
Power Supply Considerations for Smart Strips
Smart strips often require a constant voltage power supply (12V or 24V). A 24V system is better for longer runs because it reduces voltage drop. It also costs slightly more than 12V, but the performance gain is worth the extra few dollars if your cabinet run exceeds 15 feet.
What Is the Best Color Temperature for California Kitchens?
Color temperature is measured in Kelvin (K). The wrong temperature makes your kitchen look clinical or dingy.
Warm White (2700K to 3000K)
This is the standard for kitchens and living spaces in California homes. It matches traditional incandescent bulbs and creates a cozy, inviting atmosphere. It is the safest choice for under-cabinet lighting because it makes food and countertops look natural.
Cool White (4000K)
Cool white is often used in modern, minimalist kitchens with lots of white and gray. It is brighter and feels more crisp. It can look harsh if your kitchen has warm wood tones or yellow walls. Use it sparingly, or only in task areas above the sink or stove.
RGB and Color Changing Options
RGB strips are popular for entertainment rooms but look tacky in a kitchen. While they are affordable fun, they are not practical for cooking or cleaning. Stick with white light for functionality and add a separate RGB strip in a cove for mood lighting if you want both.
How to Find Deals on LED Strip Lights in California
You do not have to pay full retail. Many local and online sources offer significant discounts if you know where to look.
Local Electrical Supply Stores vs. Big Box Retailers
Local stores in Los Angeles, San Diego, or the Bay Area often carry commercial-grade strips that last longer than consumer-grade boxes from big retailers. They may have open-box deals or bulk discounts. Ask for “commercial grade LED tape” rather than hobbyist strips.
Online Retail Strategies
Avoid the very cheapest listings on generic marketplaces. Instead, look for sellers with high ratings (98%+ positive) that specialize in LED lighting. Use filter tools to sort by “highest CRI” or “lowest price per foot.” Compare three products side by side before adding to cart. Sign up for newsletters, as small lighting brands frequently run sales on last seasons stock.
Seasonal Sales and Rebates
California utility companies sometimes offer rebates for energy-efficient lighting upgrades. Check with PG&andE, SCE, or SDG andE for rebates on qualifying LED products. Memorial Day, Black Friday, and Amazon Prime Day are also prime times to buy strips at 30% to 50% off.
Why Buying Cheap Strip Lights Costs You More in the Long Run
It is tempting to choose the lowest price, but there are hidden costs to poor-quality LED strip lights that most people do not consider.
Early Burnout and Flickering
Cheap strips overdrive their LEDs to appear bright but burn out within a year. Flickering not only is annoying but can cause eye strain and headaches. Replacing a failed strip means buying new adhesive tape, possibly damaging paint, and spending time re-installing. A quality strip costing $1.50 per foot will last 50,000 hours (17 years at 8 hours a day). A cheap strip at $0.50 per foot may last only 5,000 hours.
Electrical Safety Risks
Non-UL or non-ETL listed strips are a fire hazard in California kitchens where grease and heat are present. They lack proper fusing and can short-circuit. UL listing adds about 20% to the cost but provides insurance-approved safety. Never buy unlisted lighting for a kitchen or bathroom.
Color Shift Over Time
Poor quality LEDs shift from cool white to green or pink after a few hundred hours. This makes your entire kitchen look off. High-quality LEDs maintain their color temperature for the life of the strip. Look for bins within a 3-step MacAdam ellipse (SDCM under 3) for stability.
Frequently Asked Questions
Can I cut LED strip lights to any length?
You can cut LED strips only at the marked cut lines, usually every 1 to 2 inches. Cutting anywhere else breaks the circuit and ruins the strip. Always measure carefully and count the cut points before cutting.
Do I need an electrician to install LED strip lights?
Plug-in LED strip lights do not require an electrician. You simply plug them into a standard outlet. Hardwired installations require an electrician if you are connecting to the home’s electrical system, especially to comply with California building codes.
How do I hide the wires from my under-cabinet lights?
Use wire clips to run the cord along the back edge of the cabinet. For a cleaner look, drill a small hole in the cabinet bottom and run the wire inside the cabinet. You can also use a cord cover that paints to match your cabinets.
What voltage is best for long runs of LED strip lights?
24V is best for runs longer than 15 feet. It suffers less voltage drop than 12V, so the light stays consistent from the beginning to the end of the strip. This is especially important for linear kitchen layouts common in California.
Are battery-operated LED strips worth buying?
Battery-operated strips are only useful for temporary installations or closets without power. For kitchen under-cabinet lighting, they are not practical because batteries drain quickly and the light output is lower. Stick with plug-in or hardwired models for real use.
How bright should under-cabinet LED strips be?
For task lighting, look for strips that produce 400 to 600 lumens per foot. For accent lighting, 150 to 300 lumens per foot is sufficient. The brightness also depends on the color temperature and the distance from the countertop.
Can I connect multiple LED strip sections together?
Yes, but you need to use the correct connectors for your strip type (usually 2-pin or 4-pin). Do not solder if you are not experienced; use snap-on connectors. Ensure the total length does not exceed the capacity of your power supply.
Your Next Move for Affordable Kitchen Lighting
Affordable LED strip lights in California are not a fantasy. The key is prioritizing the right features: high CRI, proper voltage, UL listing, and a smart installation using aluminum channels. You do not need to spend a fortune to get a kitchen that feels warm, modern, and functional. Start by measuring your cabinets today, then pick a strip that matches your needs without overpaying for extras you will not use. Whether you choose a simple plug-in kit or a hardwired professional system, the right strip will transform your kitchen without breaking your renovation budget. Take the first step now and enjoy a brighter, more energy-efficient home.