
Indoor training has become increasingly popular among mountain bikers who want to maintain fitness during challenging weather conditions or busy schedules. Setting up your mountain bike on a trainer stand might seem complicated at first, but with proper guidance, you can transform any room into your personal training facility. This comprehensive guide will walk you through everything you need to know about using an indoor trainer stand effectively.
Understanding Indoor Trainer Stands
Indoor trainer stands allow you to ride your mountain bike stationary while simulating outdoor conditions. These devices have evolved significantly over recent years, offering various resistance levels and connectivity options. However, mountain bikes present unique challenges compared to road bikes due to their different frame geometry and tire specifications.
The market offers several types of trainers. Wheel-on trainers hold your rear wheel against a resistance unit. Direct-drive trainers replace your rear wheel entirely. Roller trainers require more balance but provide a more realistic riding experience. Each type has distinct advantages depending on your goals and space constraints.
Checking Compatibility Before Setup
MTB trainer compatibility requires careful consideration before making a purchase. Mountain bikes come with various axle standards, including quick-release, thru-axle, and boost spacing. Your chosen trainer must accommodate your specific axle type. Fortunately, most modern trainers include adapters for different configurations.
Frame geometry also plays a crucial role. Mountain bikes typically have longer wheelbases and slacker angles than road bikes. Ensure your trainer can accommodate these dimensions without causing stability issues. Additionally, check the maximum tire width your trainer accepts, as mountain bike tires are considerably wider than road tires.
Preparing Your Mountain Bike
Before mounting your bike, perform a thorough inspection. Check that your drivetrain is clean and properly lubricated. Dirty chains can create excessive noise during indoor sessions. Moreover, inspect your rear tire for adequate pressure and tread condition.
Consider whether you want to use your regular knobby tires or switch to a smoother option. Knobby tires work on trainers but create more noise and vibration. Many riders keep a dedicated slick tire specifically for indoor training sessions. This approach reduces noise while addressing the tire wear solution that concerns many mountain bikers.
Remove any accessories that might interfere with the trainer setup. Water bottles, GPS devices, and bike computers should stay mounted, but remove fenders or mudguards if present. These items can create clearance issues with certain trainer designs.
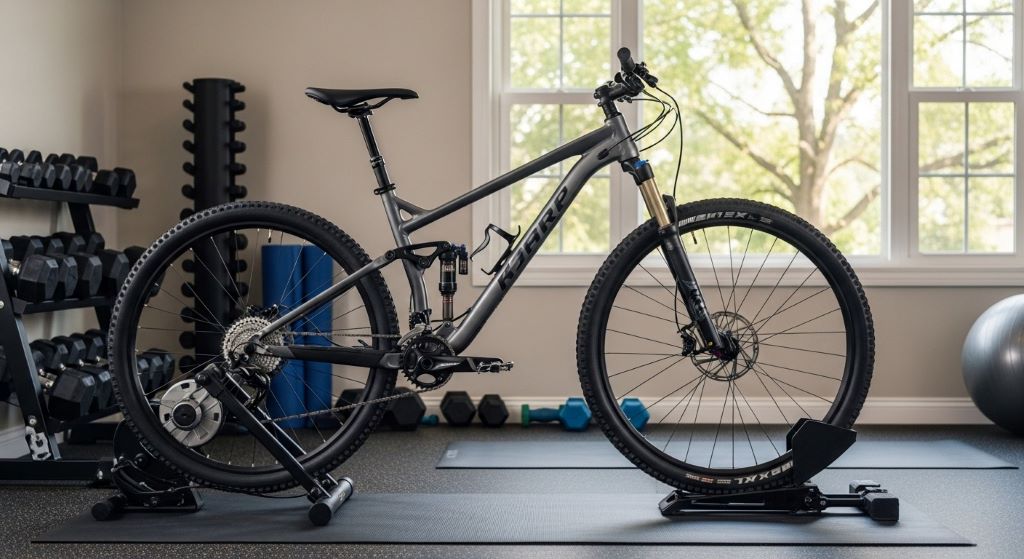
Setting Up Your Trainer Stand
Start by choosing an appropriate location. Select a well-ventilated area with adequate space around the bike. You need room to mount and dismount safely. Additionally, consider placing a mat underneath to protect your floor and reduce noise transmission.
Follow the manufacturer’s instructions carefully for assembly. Most trainers require minimal tools and assemble quickly. However, take time to ensure all connections are secure. Loose components can create dangerous situations during intense training sessions.
Position your bike in the trainer according to the specific model’s guidelines. Wheel-on trainers require proper alignment between the tire and resistance roller. Adjust the roller pressure carefully. Too little pressure causes slippage, while excessive pressure accelerates wear. Therefore, finding the right balance is essential.
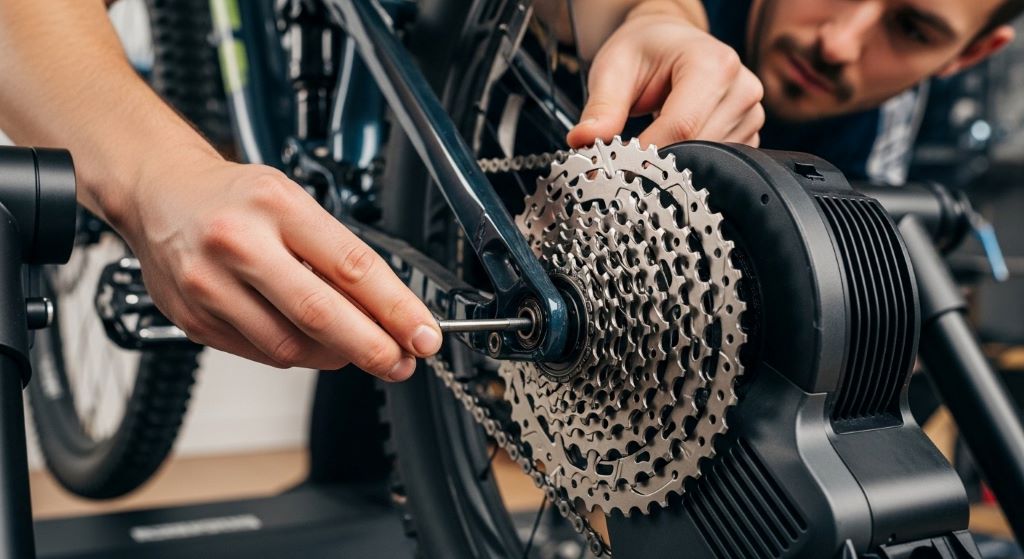
For direct-drive trainers, remove your rear wheel and install the bike onto the cassette. Align the chain properly with the gears. Tighten the thru-axle or quick-release mechanism securely. Double-check everything before attempting to ride.
Addressing Tire Wear Concerns
One significant concern for mountain bikers is tire degradation during indoor training. The consistent friction against the resistance roller creates heat and accelerates rubber breakdown. This issue becomes particularly problematic with expensive mountain bike tires.
The most effective tire wear solution involves using a dedicated trainer tire. These specially designed tires feature harder rubber compounds that resist heat buildup. They also provide quieter operation and better grip on the resistance roller. Although they cost extra, they protect your expensive trail tires from premature wear.
Alternatively, keep an old tire specifically for indoor use. Even a worn tire with reduced tread works perfectly on a trainer. This approach saves money while preserving your good tires for actual trail riding. However, ensure the tire still holds air properly and shows no sidewall damage.
Some riders invest in direct-drive trainers to eliminate tire wear completely. These trainers remove the rear wheel from the equation entirely. While they cost more initially, they eliminate ongoing tire replacement expenses. Additionally, they provide more accurate power readings and quieter operation.
Optimizing Your Training Setup
Creating a comfortable training environment enhances your indoor riding experience significantly. Proper ventilation is crucial because indoor training generates substantial heat without natural airflow. Position a fan directly in front of you to simulate outdoor wind. This cooling significantly improves comfort during intense intervals.
Your bike position should mirror your outdoor setup exactly. Adjust the trainer height if necessary to keep your bike level. An unlevel bike changes your riding position and can cause discomfort during longer sessions. Use a level or smartphone app to verify proper alignment.
Entertainment options make indoor training more enjoyable. Many riders use training apps that provide structured workouts and virtual riding environments. Popular platforms connect to your trainer via Bluetooth or ANT+, adjusting resistance automatically based on virtual terrain. Others prefer streaming services or podcasts to pass the time.
Calibrating Your Trainer
Proper calibration ensures accurate performance data. Most electronic trainers require initial calibration and periodic recalibration to maintain accuracy. Follow your trainer’s specific calibration protocol carefully. This process typically involves a warm-up period followed by a coast-down test.
Calibration becomes particularly important if you track training metrics like power output or speed. Accurate data helps you monitor progress and structure effective workouts. Furthermore, proper calibration ensures consistency between indoor and outdoor training sessions.
Environmental factors affect calibration. Temperature changes can impact tire pressure and resistance characteristics. Therefore, recalibrate if you move your trainer to a different location or notice significant temperature variations.
Protecting Your Floors and Equipment
Indoor training can damage floors through sweat, vibration, and movement. A good trainer mat protects your flooring while reducing noise transmission to rooms below. Choose a mat specifically designed for trainers rather than general exercise mats. These specialized mats offer better vibration dampening and moisture resistance.
Sweat is incredibly corrosive to bike components. Cover your bike’s frame and handlebars with towels during intense sessions. Alternatively, use a dedicated sweat guard designed to catch drips before they reach your bike. Clean your bike thoroughly after each indoor session, paying special attention to areas where sweat accumulates.
Your drivetrain requires extra attention during indoor training. The lack of natural elements means dirt doesn’t wash away naturally. However, the constant pedaling under resistance accelerates chain wear. Clean and lubricate your chain regularly to prevent premature component degradation.
Developing an Effective Training Routine
Indoor training offers unique advantages for structured workouts. The controlled environment eliminates variables like traffic, weather, and terrain changes. This consistency makes interval training particularly effective. You can maintain precise power outputs or heart rate zones without external interruptions.
Start with shorter sessions to acclimate to indoor riding. Many riders find indoor training mentally challenging despite being physically fit. Begin with 20-30 minute sessions and gradually increase duration. Additionally, vary your workouts to prevent boredom and maintain motivation.
Incorporate different training zones throughout your week. Easy recovery rides help you adapt to the trainer while building aerobic base. Tempo efforts improve sustained power output. High-intensity intervals boost your anaerobic capacity. Mix these elements strategically to achieve balanced fitness development.
Maintaining Your Trainer and Bike
Regular maintenance keeps your equipment functioning optimally. Inspect your trainer before each use for loose bolts, worn parts, or unusual noises. Address any issues immediately to prevent more serious problems. Most trainers require minimal maintenance, but preventive care extends their lifespan significantly.
Keep your trainer clean by wiping it down after each session. Sweat and dust can accumulate in mechanical parts and electrical connections. Use a damp cloth for general cleaning and occasionally apply appropriate lubricant to moving parts according to manufacturer recommendations.
Your bike requires special attention during regular indoor training. Check your rear tire pressure before each session. Inspect your chain for wear more frequently than during outdoor riding alone. The constant resistance accelerates component wear, so monitoring becomes essential for safety and performance.
Transitioning Between Indoor and Outdoor Riding
Moving between trainer and trail requires some adjustment. Indoor riding eliminates the balance and handling skills required outdoors. Therefore, take time to reacquaint yourself with outdoor conditions before attempting challenging trails after extended indoor periods.
The power you produce indoors typically exceeds what you sustain outdoors for equivalent perceived effort. This difference occurs because indoor riding eliminates coasting, cornering, and other breaks in pedaling. Adjust your expectations accordingly when returning to trails. Your fitness remains strong even if initial outdoor rides feel different.
Weather changes affect this transition significantly. If you trained indoors during winter and return to trails in spring, allow several rides to readjust. Technical skills need refreshing after extended indoor periods. Start with familiar trails before tackling new or challenging terrain.
Conclusion
Using an indoor trainer stand for your mountain bike opens new possibilities for year-round fitness development. Understanding MTB trainer compatibility ensures you select equipment that works seamlessly with your bike’s specifications. Implementing a proper tire wear solution protects your investment while maintaining quiet, effective training sessions. From initial setup through ongoing maintenance, attention to detail creates a positive indoor training experience. Whether you train through harsh winters or supplement outdoor riding during busy periods, an indoor trainer becomes an invaluable tool for maintaining and improving your mountain biking fitness.
Frequently Asked Questions
Can I use my mountain bike on any indoor trainer?
Not all trainers accommodate mountain bikes properly. Check your bike’s axle type, tire width, and frame geometry against the trainer’s specifications. Many trainers require adapters for thru-axles or boost spacing. Additionally, ensure the trainer accepts your tire width, as mountain bike tires exceed road bike dimensions significantly.
How often should I replace my trainer tire?
Trainer tire lifespan depends on usage frequency and intensity. Most dedicated trainer tires last 6-12 months with regular use. Monitor for signs of excessive wear, flat spots, or reduced grip. If you notice increased slippage or unusual noise, replacement time has arrived. Regular tires wear much faster on trainers.
Do I need to calibrate my trainer regularly?
Yes, regular calibration maintains accuracy. Perform initial calibration when setting up a new trainer. Recalibrate every few weeks or after moving your trainer to maintain consistent power readings. Additionally, recalibrate if you notice unusual resistance levels or inconsistent performance data during workouts.
Will indoor training damage my mountain bike components?
Indoor training accelerates certain types of wear, particularly on your drivetrain. Sweat also corrodes metal components if not cleaned properly. However, proper maintenance and protection measures prevent significant damage. Clean your bike after sessions, use sweat guards, and monitor component condition regularly to extend lifespan.
Should I keep my mountain bike permanently on the trainer?
Keeping your bike mounted continuously is convenient but has drawbacks. Constant pressure on tires can create flat spots. Additionally, you miss outdoor riding opportunities. Most riders prefer removing their bike between sessions to prevent tire deformation and maintain flexibility for spontaneous outdoor rides when conditions permit.
Related Topics:
Top Motorcycle Accessories for Any Respectable Bike
Vitamin K2 vs Vitamin K1: Your Body Needs Both (But Not The Same Way)